Saturday, December 31, 2011
2011 Recap
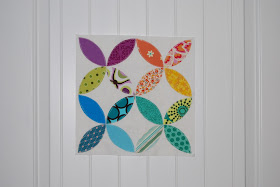
19 finished quilts, and a whole bunch of SBS blocks...
And a whole bunch of other stuff! :) Good sewing year!
Wednesday, December 28, 2011
Christmas was fun!
Christmas was a blast this year! The weekender bags were a HIT!
So was the Lego bag! In fact - that may have been the biggest hit of the little man's entire haul! Yea!!
As for me - as we opened presents, I was wildly spoiled with clothes, and shoes... check out these beauties...
I feel a new blog header coming on... :)
I also got (myself) this book:
I am so excited to get into it and learn some new techniques and things! Yea!
But, as the present opening wound down, the one thing that I had asked for - a Dress Form - remained absent. I was so bummed. But, I didn't want to whine on Christmas - especially when I had received such beautiful heels, so I didn't say anything and just started plotting when I could buy myself one. Afterward, as we were getting ready to pile in the car to go look at Christmas lights, (we open family gifts on Christmas Eve - to keep them separate from the Santa mayhem) I opened my car door to find:
It was sitting in my seat!!!! hahaha! My hubby laughed and said, "Well, I had to surprise you somehow!"
Isn't she lovely? Her name is Trisha. I can't wait to put her to good use!!! :)
On Christmas morning, after the Santa mayhem, we went to church!
(He's a little monkey, isn't he?) Doesn't the Princess look pretty? I was right, though - we left a huge pile of glitter in the pew at church. I felt bad... but at least she looked good!
It was a wonderful holiday! We took a getaway to Zion National Park on Christmas day for a few nights, and the Weekender Bags were used and were a huge success!! I am so happy I made those!
Hope everyone had a great holiday too!!
So was the Lego bag! In fact - that may have been the biggest hit of the little man's entire haul! Yea!!
As for me - as we opened presents, I was wildly spoiled with clothes, and shoes... check out these beauties...
I feel a new blog header coming on... :)
I also got (myself) this book:
I am so excited to get into it and learn some new techniques and things! Yea!
But, as the present opening wound down, the one thing that I had asked for - a Dress Form - remained absent. I was so bummed. But, I didn't want to whine on Christmas - especially when I had received such beautiful heels, so I didn't say anything and just started plotting when I could buy myself one. Afterward, as we were getting ready to pile in the car to go look at Christmas lights, (we open family gifts on Christmas Eve - to keep them separate from the Santa mayhem) I opened my car door to find:
My Dress Form!!
It was sitting in my seat!!!! hahaha! My hubby laughed and said, "Well, I had to surprise you somehow!"
Isn't she lovely? Her name is Trisha. I can't wait to put her to good use!!! :)
On Christmas morning, after the Santa mayhem, we went to church!
(He's a little monkey, isn't he?) Doesn't the Princess look pretty? I was right, though - we left a huge pile of glitter in the pew at church. I felt bad... but at least she looked good!
It was a wonderful holiday! We took a getaway to Zion National Park on Christmas day for a few nights, and the Weekender Bags were used and were a huge success!! I am so happy I made those!
Hope everyone had a great holiday too!!
Wednesday, December 21, 2011
WIP Wednesday - sigh of relief edition
That's it. I'm done. I made all the bags I am going to make, all of the ornaments that I am going to make. My Christmas sewing list has all been checked off. Some crossed off for sanity's sake, but all the projects that needed to be done are done!
What a glorious feeling! And now just for fun... a recap of all the crazy holiday stitching...
Weekender Bags - all three of them!
Dopp Kits + a tutorial - to go with the weekenders
Lego bag
Skirt
Stocking
The Dress
The Dress that didn't work
Bags and ornaments - I didn't end up with pictures of all of them... but you get the point!
So what's on tap for 2012?
I have E's King size Zig Zag as my only currently in progress project. Wow. Only one. Weird.
I am still working on Skill Builders Sampler! I still need to make block 20, but that's going to have to wait until next week.
I have joined in a Quilting Bee for 2012! We are called the Beejeebers, and it is hosted by Melissa at Happy Quilting! I am totally excited!! Funny story - Melissa asked for name suggestions, and I recommended Beejeebers as a joke. I was telling her that this is my first Bee, and it scared the beejeebers out of me. So the next question was about a name, so I put down that. haha! Everyone liked it. I think that is just plain awesome! :)
Other than that - I plan on being a little more reasonable next year. My unlimited sewing budget was, once again - summarily rejected. So, no more than one quilt per month, and I want to do a lot more "other" stuff - like cloths, bags, and things. Should be a great year!!
Hope everyone out there has a wonderful holiday season, and a wonderful New Year!!
Tuesday, December 20, 2011
The Dress
So, sorry about my freak out yesterday. I was feeling stressed! :) BUT! I am happy to say that yesterday proved to be a very productive day! For sewing. But don't look at the state of the rest of my house... yikes.
Anyway - I finished the princess's Christmas dress today!! YEA!!! And it really turned out beautiful. Probably my favorite dress that I have made to date! :) So here it is in all it's glory:
The Princess stayed home from school sick today, but I drug her outside for pictures anyway. Please overlook the lack of hair doing! :)
She picked gold and red so that she could have Griffindor colors. We are currently reading book 7 of the Harry Potter series, and at present, that world has overtaken our lives! :) At least they are Christmas colors too!
She picked out the trim on the over skirt. I wasn't sure about it, but I really like the way it looks! So pretty! The flower was purchased at Joann's. Lovely finishing touch!
Now that this is done, everything else just seems easy! I may even have time to read a book or two! :)
Monday, December 19, 2011
Crunch Time
I got Z-E-R-O sewing done over the weekend. We were babysitting our niece and nephews, and therefore N-O-T-H-I-N-G got done. Except a lot of stress eating. But that's another story... hahaha!
So now, I am feeling the crunch. I don't have a ton left, but I do have some major holiday deadlines. I have one more bag to make, one more ornament to make, Princess's dress to finish, Rudolf cupcakes to make, and a whole lot of delicious fudge to make and take to neighbors. And only 5 days to do it.
Today, I have tried to get some progress made - and I have, a little - but it seems like when you need to get things done - everything that can go wrong does! As I was working on the dress today - my thread kept breaking. This normally isn't a huge issue, but it was for gathering the skirt, and that really does need to be one long thread. Then, I ran out of bobbin thread. Grrr... And to top everything else off - every inch of my sewing room is covered in red glitter. Why? Because I allowed the princess to pick out this fabric for her over skirt:
Why do they even make glitter fabric? Oh, yeah - because it LOOKS good. But it is a MESS!!! :)
Wish me luck over the next few days! I am feeling pretty good about things, but we shall see!
Wednesday, December 14, 2011
WIP Wednesday - hang in there edition
Last week, my brain decided to take a vacation. Seriously. I forgot to take my son to preschool one day!!! Well, almost - I would have forgotten, but the other car-pool mom called me and asked where the heck I was (in a much nicer way), so they were only about 20 minutes late. Seriously, who does that?
I also forgot to do a WIP post. It threw me off. I didn't realize how much this weekly post helps me keep things together! So - here goes my list of WIPS!
Finishes:
One teacher gift, a fabric ornament
Tutorial found HERE at V and Co. I love how it came out, but I really hate hot glue!!
A Few drawstring bags for friends
Tutorial found HERE. This is a great tutorial! It is quick, and really cute!! Love them (want to keep them!!)
Stocking!
Read about this one HERE.
Progress:
SBS Block #19
SO cute!!! SO CUTE!! I love this block!
Princess's dress - all cut out and in the "next up" position! Yea!
E's King size - all cut out and starting to prep for piecing!
On hold - my dress. We'll see if I can squeeze that one in before Christmas. Probably not.
So there we go! Lots of fun and I feel like I'm really making progress on the list! Only a week and a half til Christmas!!! Wowza! December has really flown...
Saturday, December 10, 2011
Can you make...?
One of my very favorite questions to be asked is "Can you make {whatever is on their mind}?" Usually it is something I haven't done before, but I almost always want to give it a try.
Yesterday one of my best friends asked me if I could duplicate a stocking for her baby. The rest of the family had stockings that looked like this:
Unfortunately, this style wasn't being sold anymore, and - naturally - they didn't want their baby boy to have one that didn't match. So, I set off, found the supplies and recreated it as best as I could. Here's what I came up with:
What do you all think? Close enough? The cream's are a little different, but I think it's probably close enough. I hope she is happy with it! :)
Thursday, December 8, 2011
Quick Skirt, and Sad News about the Dress
First up - we took family pictures today. I had tried to do some via tripod, but they were an epic fail. So I asked my sister in law to take a few for us. As I was planning the wardrobe, I realized the sever lack of nice skirts for the princess. So, I made this one. It took less than 1 hour, start to finish!!!! I am definitely going to do a tutorial on this skirt soon!
I used suiting for the first time ever! (Hello, TNT!)
I must say - I have now fallen in Looooooove with suiting! It is so soft and the perfect weight! And the lining fabric was so silky too... I love finding a good fabric! It does fray a bit, but not any worse than organza or satins.
Check out my hem-less hem! It was so easy and I'm glad it worked as well as it did! Again, stay tuned for the tutorial!
So, in other news, I managed another epic fail on my pretty blue dress. Everything went pretty well, but once the zipper was in I found a major problem with the fit that cannot be easily fixed. I would have to redo the entire bodice (and that's the hardest part of the dress!) Grrr...
I am sad about it, but - never to be kept down - I know what needs to change, and I am planning on redoing the dress - in suiting. **Delighted Sigh** I think I will like this much better than satin prom-dress material anyway! :)

Linking up to TNT at Happy Quilting!! Cheers!
I used suiting for the first time ever! (Hello, TNT!)
I must say - I have now fallen in Looooooove with suiting! It is so soft and the perfect weight! And the lining fabric was so silky too... I love finding a good fabric! It does fray a bit, but not any worse than organza or satins.
Check out my hem-less hem! It was so easy and I'm glad it worked as well as it did! Again, stay tuned for the tutorial!
So, in other news, I managed another epic fail on my pretty blue dress. Everything went pretty well, but once the zipper was in I found a major problem with the fit that cannot be easily fixed. I would have to redo the entire bodice (and that's the hardest part of the dress!) Grrr...
I am sad about it, but - never to be kept down - I know what needs to change, and I am planning on redoing the dress - in suiting. **Delighted Sigh** I think I will like this much better than satin prom-dress material anyway! :)

Linking up to TNT at Happy Quilting!! Cheers!
Monday, December 5, 2011
Lego Bag!
As one of my many Christmas projects this year, I decided to make a Lego Bag for my 4 year old boy. When I saw Lee's tutorial a few weeks ago, I knew our house HAD to have one! I am happy to say - it's done!! Yay!!!
Here's the outside of the bag. I used some left over Halloween fabrics (that weren't too Halloweenish, and some fabrics from my stash.
There's the inside! I happened to have this blue fabric in large quantities for a number of years. I don't remember what I originally bought it for, so now it has made a lovely inside for our bag/play mat!
My hubby had some cording and grommets, and I had a few cord locks on hand.
So, did you catch that? ALL of the fabric and supplies were taken from my stash, or already in my house, which (somehow) makes this bag free. ;)
Thanks again to Lee for this great tutorial!! I know it (and all the Lego's that are going to be inside of it) will be a big hit this Christmas!
Saturday, December 3, 2011
Dopp Kits - A Tutorial!
Today I finished the Dopp Kits to go with the Weekender Bags. I fiddled and tweaked and changed the original tutorial (found HERE) so much, that I am going to share a new tutorial - Dopp Kits, Linz style. ;)
For those who are not familiar with the term "Dopp Kit" - it is just a manly term for a toiletries bag. :)
Materials:
1/3 yd main fabric
1/3 yd lining fabric
2/3 yd fusible interfacing
1 12" (or longer) zipper
Cut:
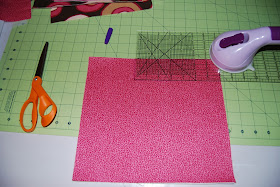
From main: 2 - 11 x 10 inch rectangles
From lining: 2 - 11 x 10 inch rectangles
1 - 3 x 7 inch rectangle
From interfacing: 4 - 11 x 10 inch rectangles
Apply fusible interfacing to the wrong side of all 4 rectangles (main and lining fabrics)
On ALL 4 rectangles (main and lining fabrics), on 11" side, measure a 4 x 2 inch rectangle from one side, mark the side line only.
Move ruler over 3 inches, mark next side line and bottom line.
Do this on both sides on all 4 rectangles, so there is a 3 x 2 inch rectangle marked in center of 11 inch side as seen below.
On all 4 pieces, cut out 3 x 2 inch rectangles. They will look like H's now.
Zipper! I find it helps to sew a little zig zag stitch at the top of my zipper to keep it together. To do this, simple set a short zigzag stitch length and stitch a few times in the same spot above the zipper head.
At the end of the zipper, create a stop block by setting a long zig zag stitch and stitching a few times in the same place, so that the stop is just short of where your fabric ends. The zipper will need to be 10 inches long.
Make a zipper sandwich. With one piece of LINING right side up, lay your zipper right side up on top of it, keeping the stops just inside the edges. lay on piece of main fabric on top, right side DOWN.
Pin all layers in place, and then trim off excess zipper. Mine was way long...
Using your zipper foot, stitch the layers together.
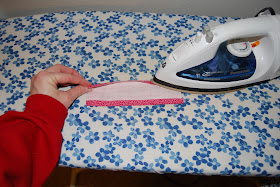
Flip open and press.
I like to top stitch, again using the zipper foot. This isn't strictly necessary, but I think it looks nice.
Now, make the zipper sandwich on the other side, stitch, press, and top stitch in the same manner.
Once that is finished, flip like fabrics together like so:
Stitch the long edge on main fabric the entire length.
On long side of LINING, leave a 4 - 5 inch hole for turning.
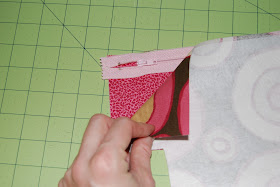
Now, on the short end of MAIN fabric, on the side where the TOP of the zipper is, line up edges with zipper in the middle, like so:
Place on machine, folding the lining edges down like so.
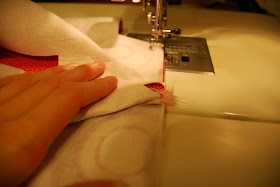
This can be a little tricky, but carefully stitch the main fabric together, just catching the lining around the zipper. Do the EXACT same thing for the lining, catching a little of the main at the zipper.
Make sure to fold them back so you are only getting a small amount as you stitch over the zipper.
When finished, you should have closed off both the main portion and the lining, with the zipper caught in both. It looks like this:
Now, reach on in and open up that zipper. If you don't, you won't be able to turn it!
Now do that same tricky step on the other end of the bag.
Set that aside for now to make your handle. Press 1/2 inch down on both sides of handle
Then, fold in half and press down.
Top stitch 1/4 inch on both sides of handle. Now it's done!
This next part can be a little bulky as you make the corners, so be patient and don't be afraid to manipulate the bag as you go!
Pinch the corners so that the seam is centered on the other side of the cut out square. Slide your handle in and center it in the seam.
Stitch the corner closed.
On the opposite side (make sure to do this on the short side!) bring the handle over (make sure it's not twisted!) and pinch the corner in the same manner. Stitch as before.
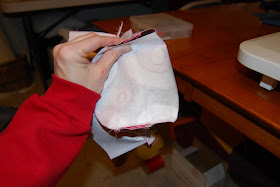
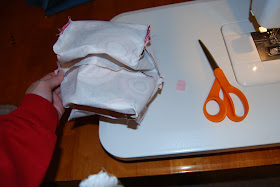
Now, start pinching and stitching all remaining corners. It gets bulkier with each corner, so be patient!
Once all corners are sewn, trim off excess zippers and seams as necessary.
Through the opening in lining, begin to flip your bag right side out.
As you turn, keep the lining out of the main bag.
Stitch the opening in the lining closed, either by machine (as I did, but you do have to manipulate it a bit!), or by hand.
Push lining into bag and push out all courners until shape is correct.
Ta-da!! You have made a nice little dopp kit!!
Look how cute it looks with the Weekender Bag!
Now fill it with travel supplies and enjoy your trip!


