Tuesday, August 31, 2010

Prototype

So, a few weeks ago, at my daughter's dance class, I saw a dance bag that was WAY cute! I asked the owner (well, the owner's mom) if she had made it, to which she started laughing. So, no. Then I asked if I could inspect it so I could try to recreate it. Today, I give you - my prototype!

It's not exactly the same, but it turned out really really cute! Introducing - the Tutu bag.


So cute - so girly. And, you may notice, I have been having a LOT of fun with my new sewing machine! I LOVE the designs I can do now! (YIPEE!!!)

This one is not my best work. I used uber cheap fabric and spent - oh - about 45 minutes total on it. So it's got some problems. But I just wanted to see how easy it would be... oh, and I planned to do some applique (DANCE on the front) but forgot...


The next one(s) I make with probably go into my shop. This can be a great personalized item.


Oh - and I am going to make one for a GIVEAWAY very soon!!! Stay tuned!

Friday, August 27, 2010

Best Husband Ever

AWESOME Story!!!!

Okay - I have been pining over the sewing machine of my dreams for a long while now... I have been trying to save up (or, you know, spend less on other things...) so that I could talk my hubby into getting it. TWICE now, just when I thought we were getting close, I got a toothache. YESTERDAY, I had to go in for my SECOND root canal this year. Bye-bye sewing machine, right?

Well, yesterday my sweet husband saw how discouraged I was about my teeth, and therefore, my sewing machine, and he went on a mission. He knew what I wanted, but didn't know where they sold it. He went to two different quilt shops looking. He didn't find it yesterday.

So today, he came home from work early, and then asked me to get something out of the back of his truck. Guess what I found on the back seat!!!!


That's right - my dream machine!! It's a Janome MC 6600P. It's gorgeous. I can't wait to use it (because this JUST happened!!)

So, I must give a HUGE thank you and I LOVE YOU to the love of my life. My eternal sweetheart, Michael. I LOVE YOU BABE!!!!

Now, let's get sewing!!

Tuesday, August 24, 2010

I've been...

Quilting...

(And this one is going to take a while... sigh...).

And organizing!!!

This is a pretty bad picture of my sewing storage room. It's all nice and organized now! Yea!!! I'm so happy!

Fabric and Pattern Giveaway!

There is a great giveaway at THIS site! A Cluck. Cluck. Sew pattern along with 10 fat quarters to make it!!

Go check it out and enter to win!!!

Thursday, August 19, 2010

Happy Circles!

As I was making this quilt, I kept having the "what was I thinking?" thought. Sewing curves isn't all that easy...

BUT! As seems to always be the case, the harder the sewing, the more awesome the quilt! I LOVE this quilt now!! It really turned out cute!

So, here it is... Happy Circles Baby Girl Quilt!


Check it out in the Shop!

Monday, August 16, 2010

Wednesday, August 11, 2010

Play Ball!

I was going to wait until I finished it, but I just can't wait...

So - I will now debut my original design - Play Ball! As I mentioned in the last post, I designed this quilt myself. I will be putting together a pattern tutorial and putting it in the shop!! Yea! My first pattern!


I just love this quilt top! Stay tuned for the finished product and the pattern! Yipee!!

Monday, August 9, 2010

A tease!

So, I have been working on some projects!

First - did I mention the boy quilt obsession? Because it's real. The one I'm working on now is one that I designed myself! It's been fun to have an idea form in my mind and then come to life in my hands! And I think it's turning out really REALLY well!!

Here's a teaser of that one...


Second, I don't want to leave the girls out, and I happen to have this in my stash...


I already have a great idea for this one too, so stay tuned!!!

Friday, August 6, 2010

Ditty Bag Tutorial

This morning, as my hubby was leaving for work, he said, "Hey, hon? Can you make a ditty bag for those repelling gloves? Thanks honey! You're the greatest wife in the whole world!" Okay - maybe he didn't say that exactly, but the point is he needed a quick ditty bag. Which, in case you aren't familiar with - is a bag. To hold stuff. That's it.

So, I thought - hmmm... maybe this would be a fun thing for my first tutorial! They are, after all - really easy and really fast! So, here we go!


You will need:
Fabric (I'm not doing measurements here - make whatever size you need. Today, I used two 14" x 15" pieces, and I used scraps.)
Cord (again, it depends on what size your bag is. Shock cord or thin rope work well.)

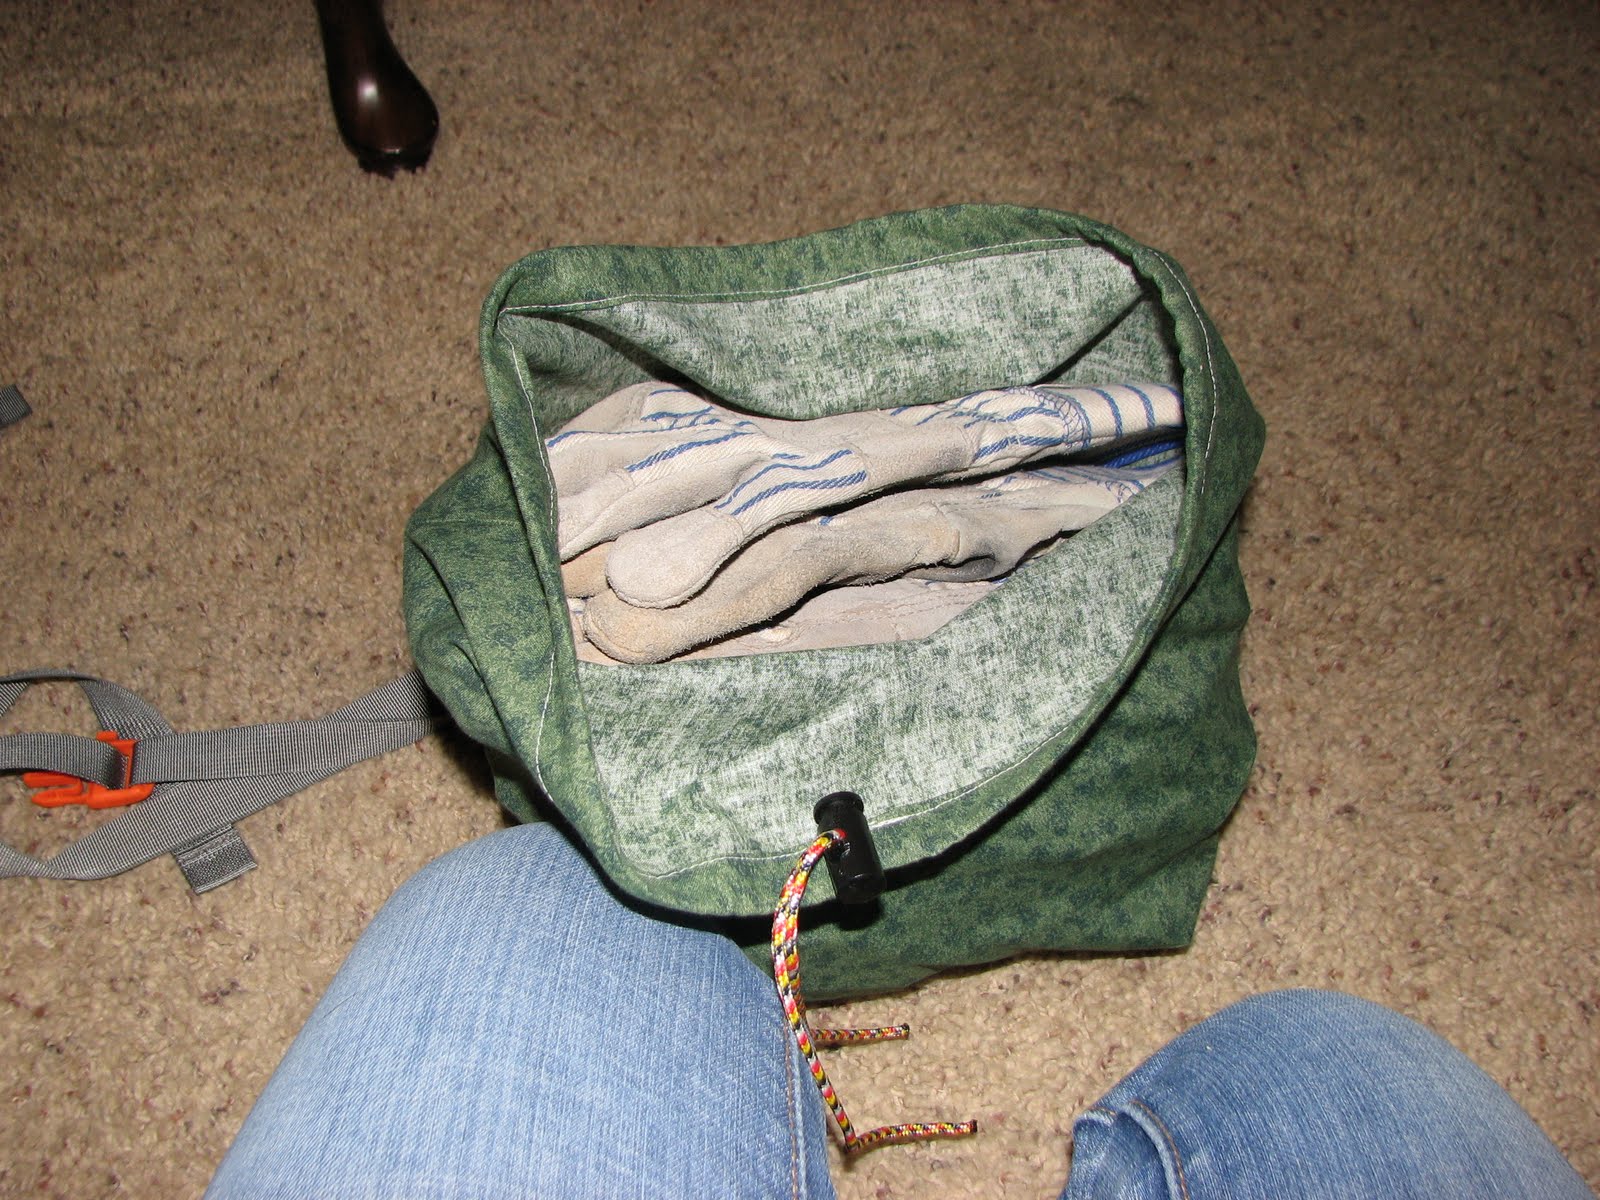
A Cord-lok (those little slidey things that keep bags closed. You can see it in the picture!) You can find these in the camping supply section of stores like Ace or Walmart.

Okay - start by cutting your fabric to the size you would like. Any. Size. Works. Like I said, today I did 14 x 15, but I have made smaller ones (like 6x6) and hUge ones (Like 44x36).


At the bottom, cute away a square on each side. I did mine 3x3, but if you are doing a bigger bag, you'll want to do larger squares.


With right sides together, stitch the sides and the bottom. Press seams open.


Now, for the bottom, you are going to open the square by pulling the corners apart. Or, bringing the side seam to the bottom seam. Get it? Like this:


Stitch both sides.


Now, on the top, press down about 1/2 hem. You don't have to make it pretty if this is a utility bag, but if it's for something nicer, turn the edge under.


Now, I cut a little slit in the hem allowance. For the cord. This is a utility bag, so I'm not worried about leaving a raw edge. If you want it to look nicer, zigzag or button hole the edges to make them look nice.


Stitch hem in place all the way around.


Feed cord through slit all the way around. Using a safety pin helps with this if you need.


Now, turn the bag right side out. Nice, yes?


Put the cord-lok on by squeezing it open and feeding both ends of the cord through.


Add your stuff


Pull tight!


And tada! A quick and easy ditty bag!

Happy sewing!

Thursday, August 5, 2010

Wonky Block Baby Boy Quilt

I told you I was obsessed with boy quilts. Okay, so this one I have been working on for a while. I was going through my fabric stash (which is something we'll be talking about again soon...) and found this fabric. It was a fat quarter bundle that I bought about 4 or 5 years ago and then forgot about. haha.

So, while the hubby was away at Scout Camp (and I was busy not sleeping) I just decided to start chopping up the fabric - with only a small idea of what I would do.

I went with a wonky block style - a totally fun off centered block. Cute to the extreme!

I finished this yesterday and I love love love how it turned out!! It is 48 x 58 - so a huge baby quilt, or perfect for a crib or toddler bed! And finally - I bound it in white. I've never done that plain of binding before - but I gotta say, I really like it! It's really crisp! And it looks AWESOME on back!!


I put in a few strips to make the back wide enough and I love how it turned out! I think making the back cool might become my "thing". lol!


This one is also in the Shop!
As a side note, I have been "borrowing" my hubby's fancy-pants camera to do these little quilt photo shoots. I don't think I'll be giving that camera back... ;)

Monday, August 2, 2010

Whimsy

And now - Here it is...


I just love this pattern! It's so visual and fun! You can see both 3D boxes and stars in these blocks! So fun!

This is the back. I pieced every last inch of fabric, and LOVE the result! The back is as pretty as the front!


It's in the Shop!