Showing posts with label 6 point star. Show all posts

Thursday, June 21, 2012

Six Point Diamond Star Tutorial


Welcome to the Six Point Diamond Star Block Tutorial!! Let's get sewing...

Materials needed:

Background fabric (mine is white) - 2 - 3.5 inch by width of fabric strips
Colors: 6 scraps 3.5 inches by AT LEAST 7 inches
A 60 degree ruler (or some method of measuring a 60 degree angle!)

All seams are 1/4 inches!

Using the 60 degree ruler, trim the end of the strip at a 60 degree angle.


Slide the ruler down 4 inches and cut at another 60 degree angle like so.


Continue down the strip. Cut 12 white diamonds.


Using the same cutting method, cut 6 colored diamonds.


Lay out all 18  diamonds in this manner:


We will be sewing the block by halves first, so separate the block into bottom and top halves like so:


Now, with your center diamonds, mark at the corners 1/4 inch from the edge like this:


Mark the edges of the side diamonds where Y seams will occur, like this:


**I forgot to get them in the picture, but mark the appropriate white diamonds as well!

Now, we are going to do our straight seams first! Take out the middle diamond and set it to the side. You will be left with 8 diamonds.

 You will stitch the diamonds together as indicated below:

When you line up the edges, you must let the ends hang over on each side by 1/4 of an inch, like this:


Press the seams OPEN! Then, back out around the center diamond.


Line up the center diamond edge with one side of the top row:


Stitch from top down to the marked X. Press seam AWAY from the center diamond.


Now, line up the center diamond edge with the other side of the top row.


Stitch from top to marked X. Press AWAY from center diamond.


Now, do the same for the bottom row. Take care to move the fabric of the top row out of the way when you stitch down to the marking!


Do this on the both sides!


Okay! Now this is the tricky part! Fold your center diamond in half, so that you can line up the edges of the top and bottom row. Line up the little "dog ears" and move the bit of fabric or the center diamond at the edge so that you can sew from the marking to the edge!
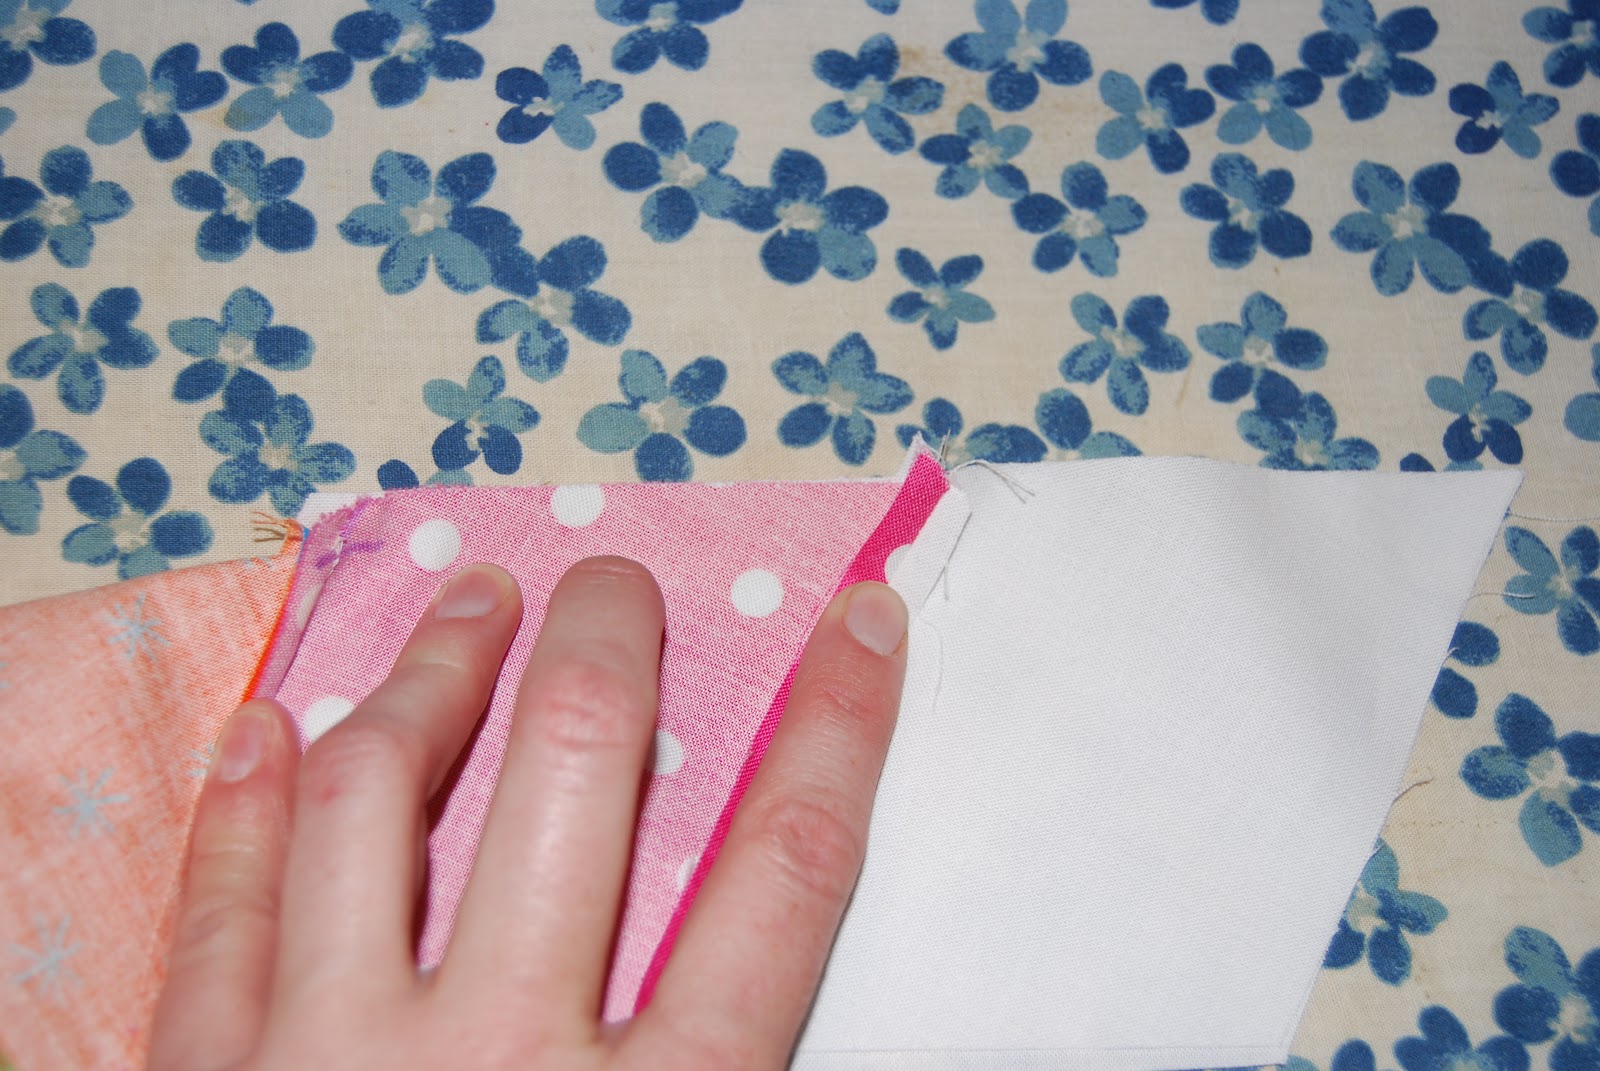

Repeat on the other edge as well! When you press the seams, open the seams, and press the corner of the diamond flat onto the opened seam, like this:


This is how the back will look when it's all pressed!


Nice, eh?

Now repeat everything on the other half!


Once both halves are sewn,  there is only one more seam to do!! To get the points nice and pointy, stick a pin in the apex of the diamond, then through the other like this:


This will keep them lined up, and your pin will be right where you need to sew! Pin the length of the seam well. If the outer edges don't line up, it's okay - we'll be trimming those anyway!!


Sew the seam, and press it open to reduce bulk in the center. Here we are! Very nice!


Now to trim. For some bizarre reason, this block isn't a perfect square. It will end up being 12 X 12.5 unfinished. so... trim it like this": The points that run top to bottom you will trim to 12 inches. Then trim the excess fabric of the other side at 12.5 inches. (If you want a square, there is enough room to do it at 12 inches. I just like the ease of using my big square thing. Do what make you happy!)


And now you are done!! Wonderful block!

Enjoy!!

Wednesday, June 20, 2012

WIP Wednesday

This... is going to be short! lol! Summer continues to be packed to the rafters, and sewing time is suffering as a result! I have done just a few little things...

Pants to Skirt

My tutorial is up! Look for it HERE! It's a fun one!


Skill Builders Sampler

I am working through the Surveyor's Compass. It's hard. Really Hard.


Next I have a feathered star which looks wildly difficult, so wish me luck! These last few are killer! :)

6 point star tutorial


Look for this one tomorrow!! Yay!

Beejeebers

This is our block for June for Erica! It was super fun!! The Tutorial can be found HERE!


That's it! Be sure to check out all the awesome WIPs over at Freshly Pieced! Today WIP Wednesday is hosted by Sukie!! So fun!

WIP Wednesday at Freshly Pieced

Saturday, April 28, 2012

The Wedding Quilt

Yesterday was one of the sweetest of all days. My sweet sister in law was married to her sweetheart in the St. George LDS temple. As a quick back story, a year and a half ago we didn't know if this amazing woman was going to live. Then, thankfully, in November of 2010, she was blessed to receive a much (much) needed liver transplant. As she began to heal and live again, she met a wonderful, sweet man and yesterday filled her dream of marriage. So many miracles. We feel so blessed.

So, as I mentioned, this week I made this quilt as a gift for them:


I really do love how these 6 point stars turned out. Y seams aren't too bad once you get used to them. I will be posting a tutorial for this very soon!


I backed it in flannel. Because I love soft, snugly backs! :)


I quilted with a meandering stipple. Mostly because it's fast. haha! But I love the way to turned out!


I am so pleased with this quilt!!

Stats: M's Wedding Quilt
Size: 55 x 64
Fabric: Melrose by Anna Fishkin and Monika Zhn for Red Rooster Fabric (btw - the line is totally gorgeous! I picked it for the purples and loved it!)
Quilting: FMQ meandering stipple
Backing: some beautiful deep purple flannel. I don't know the line... sorry!
Blocks: 6 point diamond stars (cut via Accuquilt Go! Baby)

Wednesday, April 25, 2012

WIP Wednesday

Here we go!

M's Wedding Quilt:

So, on Saturday, I had one of those "Holy Moly!" moments when I realized that my sister in law's wedding was a week away! And I had done not a thing by way of a gift. So, I did what any quilter would do... I went and bought fabric! :)

After my 6 pointed star, I thought it would be really pretty to do a quilt for her with those. Then I thought, "Hey, I have a diamond die for my Accuquilt! That will work!" So I calculated, bought all of the fabric, cut all of the fabric, then - and only then - did I realize what I had gotten myself into...

Y seams.

I've done a few before, but not many. But, I was well past the point of no return, so I forged ahead. The first 3 were my learning curve. They weren't bad, but certainly not great. Here - my first...


But, fortunately, I figured out a lot of tricks as I went and they got much, MUCH better! Here's my last!


Yea! I actually finished the quilt last night, but I sill need to get pictures, so stay tuned!! Also, I will be putting together a tutorial for this block very soon!!
E's King Size:

I am going to quilt on a long arm quilting machine for the first time this Saturday!! YEA! And the best part - I get to meet Melissa, of Happy Quilting fame!!! YEA!!

Wedding Project:

Our first shoot is coming up and I have the Western Wedding Skirt planned and cut out! I think it's going to turn out really great!!


Well, that's all! Be sure to check out all the WIPs over at Freshly Pieced!

WIP Wednesday at Freshly Pieced